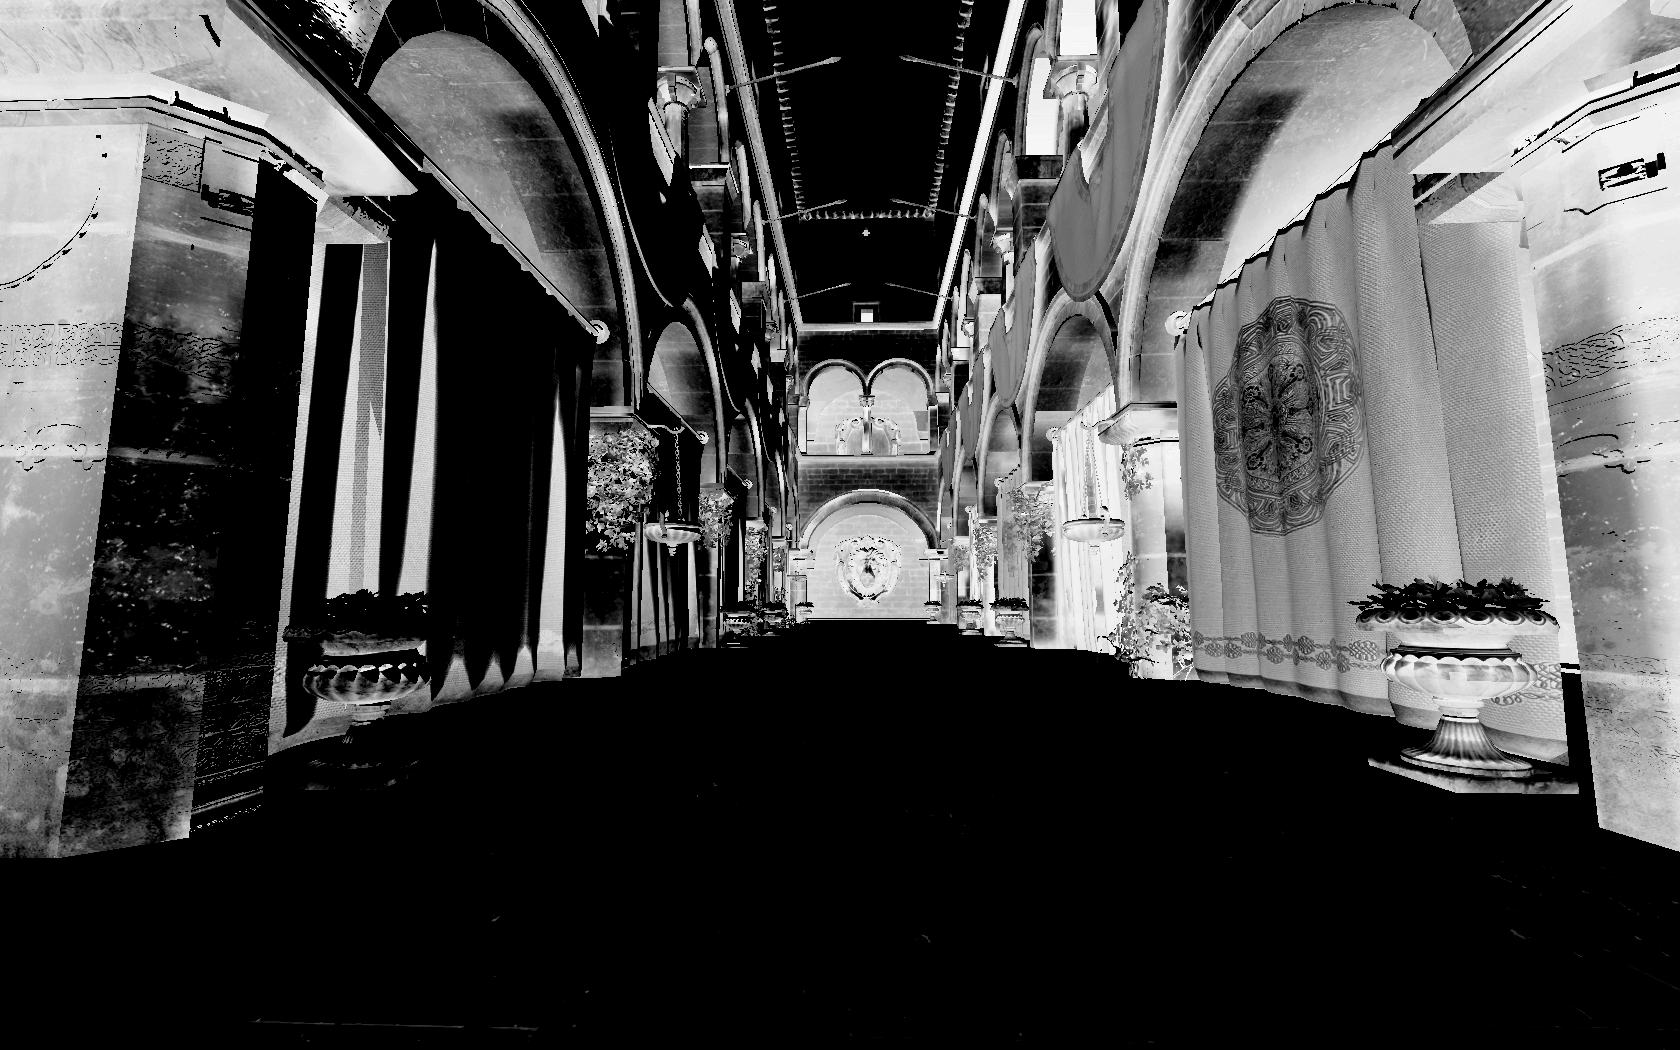
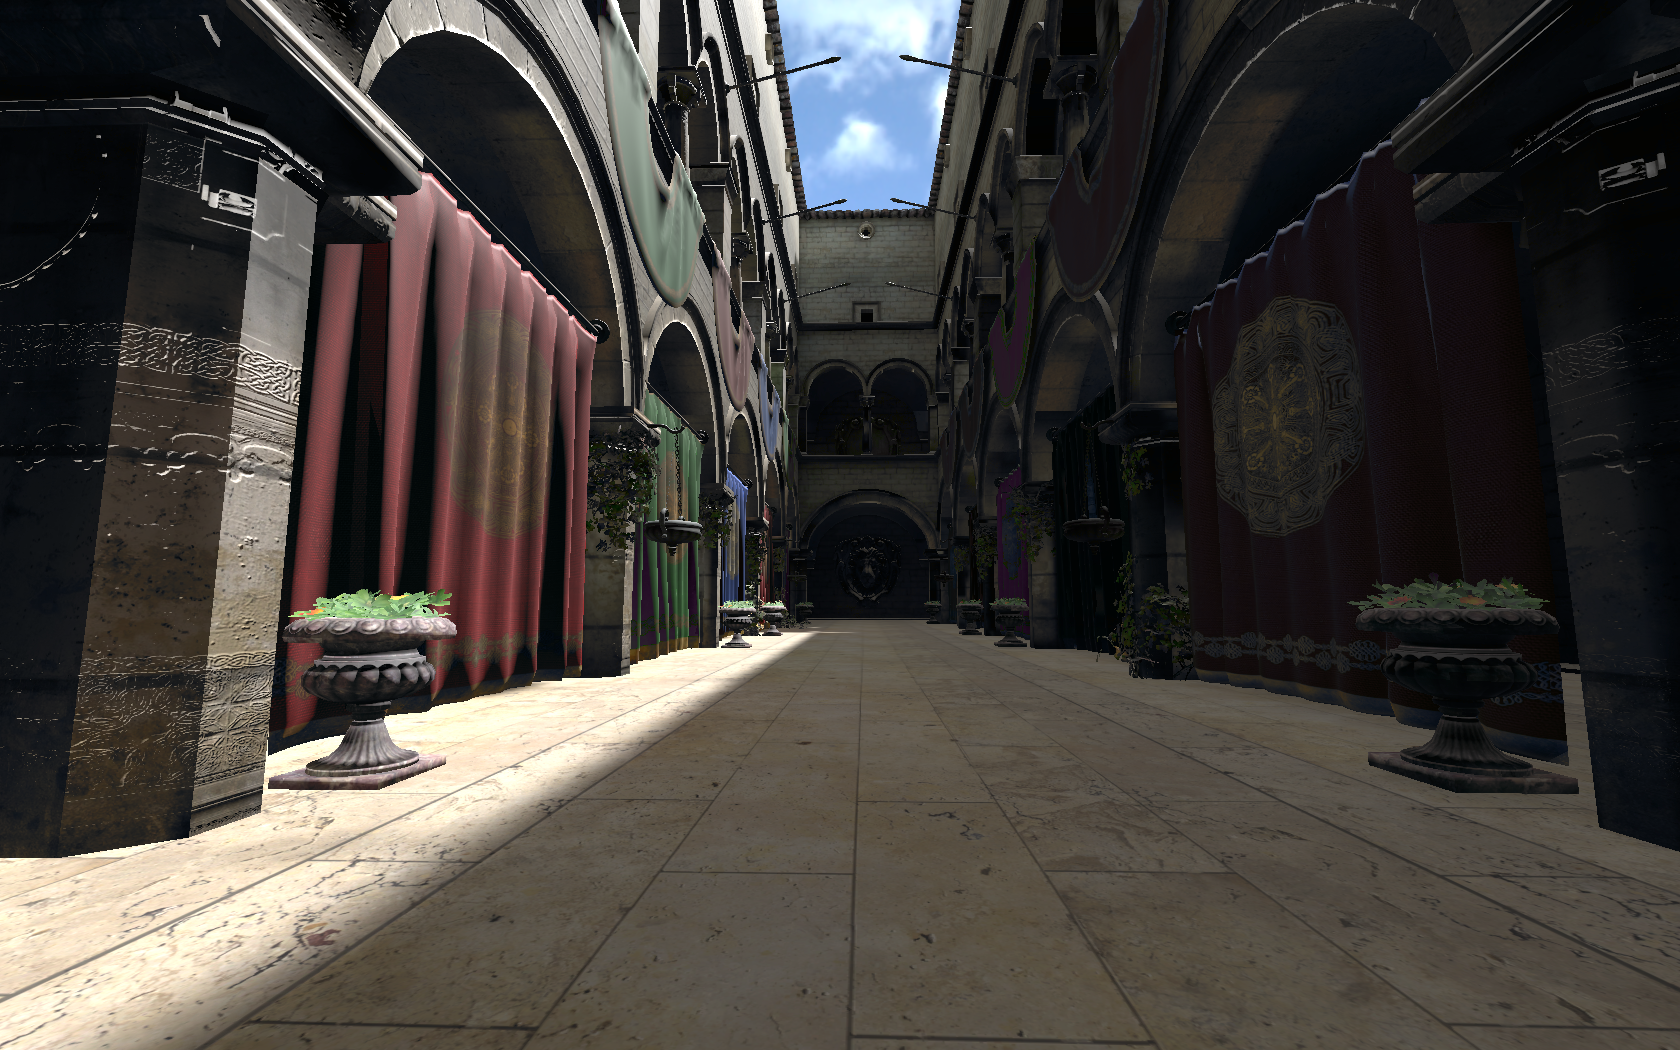
 Simple adaptive-type fog with linear gradient and normal blending
CanvasFog
If you are familiar with the Adaptive Fog shader then you know how the fog from that shader looks like, if not it's basically a color you choose to blend with the depth. Taking that as an initial point I added the option to use gradients in the fog instead of a single color. ## Features - **Gradients**: The available gradients (with their own settings) are: - Linear - Radial - Strip - Diamond - **Colors with alpha channel**: Besides having the option to choose 2 colors in the gradient, you can also change the alpha channel values to play around - **Color samplers**: You can pick the colors of the gradients from the screen - **Fog Types**: The name isn't the best, but it means that you can choose to use the adaptive fog-type or the emphasize fog-type which isn't a fog technically speaking, but it affects the "surface" of objects in the fog range. Will let some pictures below. - **Blending modes**: I added different ways for the fog to blend with the screen. The available blending modes are the following: - Normal - Multiply - Screen - Overlay - Darken - Lighten - Color Dodge - Color Burn - Hard Light - Soft Light - Difference - Exclusion - Hue - Saturation - Color - Luminosity - Linear burn - Linear dodge - Vivid light - Linearlight - Pin light - Hardmix - Reflect - Glow Last blending modes functions kindly provided by prod80. ## Some example images
Simple adaptive-type fog with linear gradient and normal blending
 Adaptive-type fog with linear gradient using color mode
 Adaptive-type fog with linear gradient using a color with transparency
 Radial gradient with high gradient sharpness
 Strip type gradient with one of the colors with 0 alpha value
 Radial gradient with screen blending mode
 You can alter the x and y values separately on the radial gradient as well as rotating it
 Emphasize-type fog with lineal gradient and color blending mode
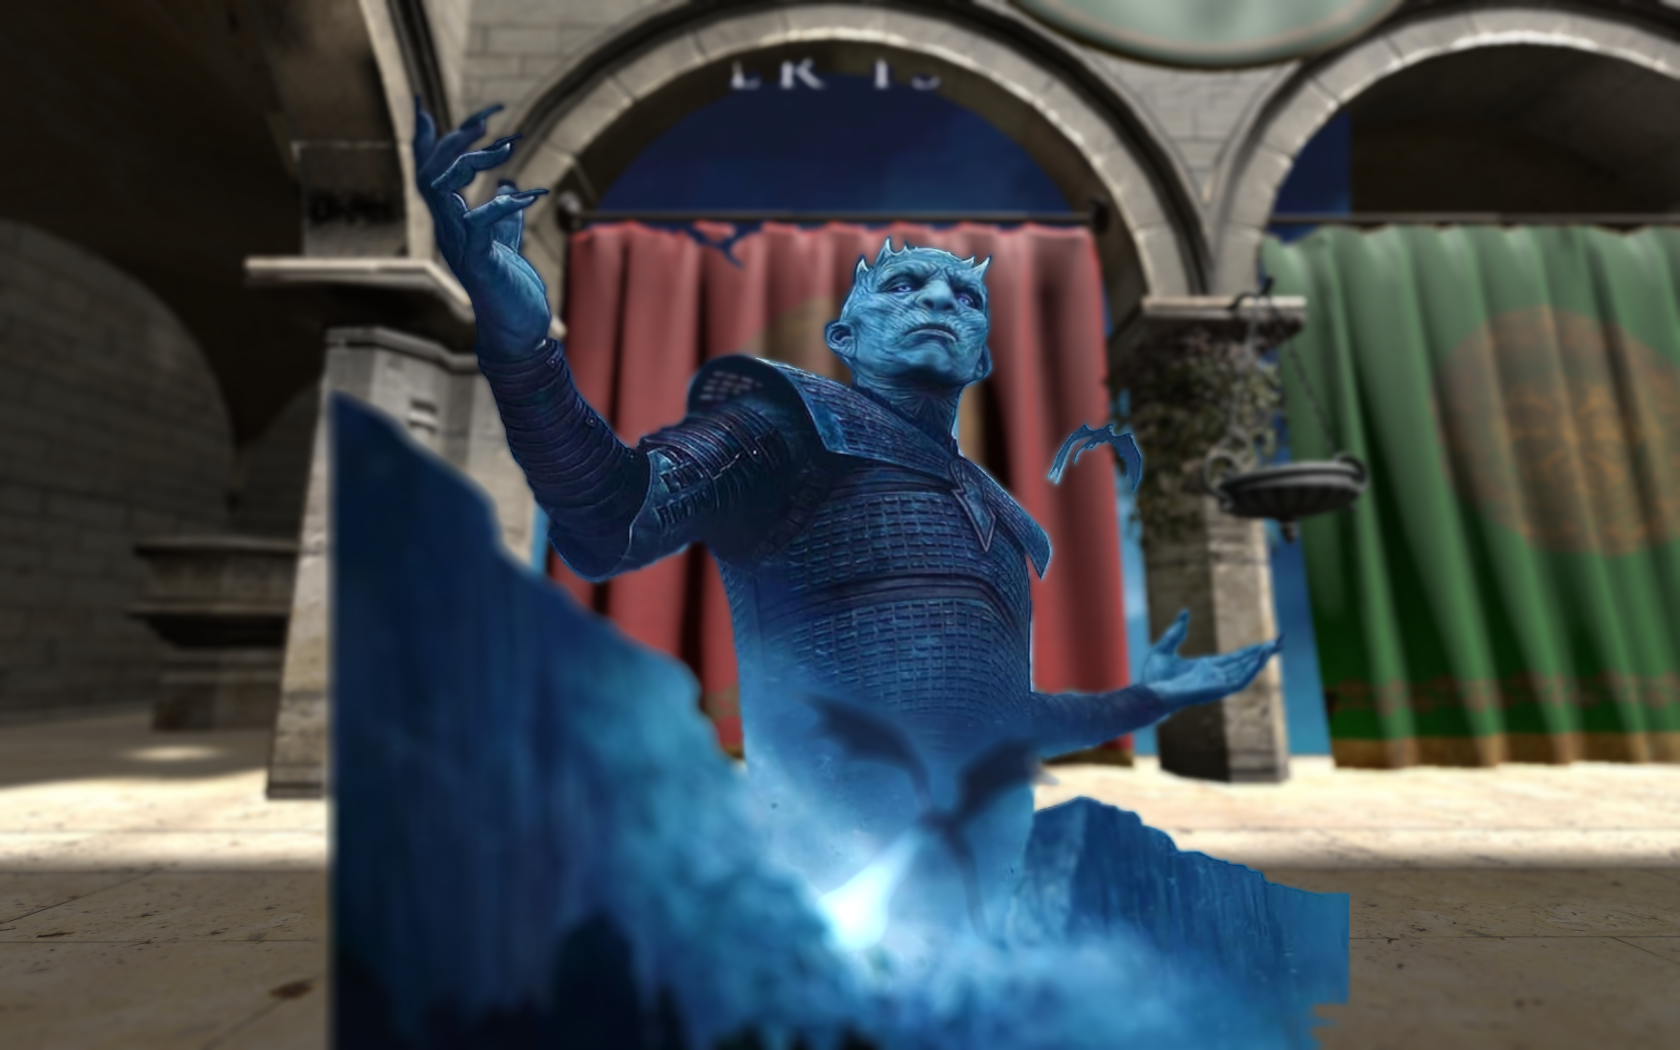
 Adaptive-type fog with diamond gradient and CanvasMask
CanvasMask
While doing the CanvasFog shader I thought that it would be cool to have these gradient stuff alongside the depth buffer to use as a mask, so here it is. It's basically has the same features from the CanvasFog shader (that are relevant for a masking shaders), not very much to add. ## Some example images Using emphasize-type mask with a LUT shader
 Using emphasize-type mask with the Comic shader
 Using adaptivefog-type mask with the DisplayDepth shader
StageDepthPlus
So again in one of those "I want to control x from shader y" moments I made some changes to the StageDepth shader. Here is the stuff it can do. - **Scale**: Possibility to adjust the scale of the image in both axis individually - **Rotation**: This one speaks for itself, you can rotate the image - **Flip**: You can flip the image horizontally and vertically - **Blending Modes**: I wrote them for the CanvasFog shader and figured out they can be usefully applied to an image - **Depth Control**: It already was in the original StageDepth. It uses the depth buffer to decide to show the image or not - **Masking**: It allows you to use an image as a mask alongside the image itself. - **Depth map usage**: Kind of an experimental feature. You can provide a depthmap image alongside the stageplus image. This one will determine if the image is shown or not. - **AR Correction**: You can now enter the definition of the image being used as preprocessor definitions so it can be automatically loaded with those values. - **StageDepthPlus_WithDepthBufferMod.fx** In the `StageDepthPlus with depth buffer modification` folder you will find what the name suggests. This version of StageDepthPlus allows you to blend a depth map image with the actual games depth buffer, so you can load an image of a subject and include it in the depth buffer, so the subject can interact with other shaders that use the depth buffer. If you wanna use this shader be sure to replace the ReShade.fxh file from your shaders folder with the one in the repos folder and edit the global preprocessor definition RESHADE_MIX_STAGE_DEPTH_PLUS_MAP to 1. This is a very experimental "feature", and because of reshade limitations you will need to set up the image controls (scale, position, rotation, etc.) in each shader that interacts with the depth buffer (extra controls will appear in each shader, alongside the same preprocessor definitions from StageDepthPlus, but you can ignore those) to match the same as the one used in `StageDepthPlus_WithDepthBufferMod.fx`. I apologize if it's not easy to use, if people find it useful I will try to improve it later. I edited the ReShade.fxh that was around with reshade 4.9.1. Don't expect it to work on newer or older versions of reshade. ## Some example images I like corgis
 Image using a depth map
 Same image using cineDOF while mixing the depth map with the depth buffer
FreezeShot
I noticed a lot of double exposure shots recently, and I thought shooting and putting the image in a layer shader must be a bummer, so I made a thing for that. Introducing FreezeShot, align the camera, adjust the depth of the subject you want to take the screenshot from and press the Freeze bool and uala! You can move and adjust it like any layer shader. It has the same controls as the StageDepthPlus. It also saves the depth buffer when you freeze the image, so you can make the layer interact with the scene. Freezing and flipping the image
 Frozen image using the saved depth to interact with the scene
Flip
I can't take credit for this one since it's a really easy shader Marty wrote in the reshade forums, I just added a couple of bools parameters to choose if you want to flip the image horizontally or vertically. I put it here since it can be useful for artistics purposes like the image below. Flip shader with a couple of instance of CanvasMask
Color Mask
As the title suggests its a shader for masking purposes using colors as the target. My intention was to imitate the "Color Range" selection function from Photoshop, so if you are familiar with that you shouldn't have much trouble using it. The shader is based on the Color Isolation shader from Daodan, so all credits goes to him. ## Features - **Target Hue**: You can select the color you want with a variable or with a eyedropper. - **Hue Overlap**: The bigger the number the lesser the amount of colors being masked. Think of it as controlling how close does the colors need to be in order to be accepted. - **Curve Steepness**: The brightness of the colors not being masked. - **Accept / Reject Colors**: Once you have the objective color setted up you can either mask all colors except the one selected or vice versa. - **Mask Strength**: Just a way to control the opacity of the shader. - **Debug tools**: If you want to see exactly what you are masking the shader offers two debug tools: - **Hue Difference**: Shows a grey-scale image allowing you to see the part of the screen that is being accepted. - **Debug Overlay**: Show a color table with a black line that points out the colors being masked. Both of these debug options were made by Daodan and are quite useful, would suggest you to use them. - **Highlights and Shadows selection**: As the "Color Range" function in Photoshop you can use this to mask shadows independently of the hue, and if you use the "Reject Colors" option you can mask highlights. ## Some example images Original scene
 HueFx shader applied while masking all colors except blue
 Using the eyedropper to sample a color from the screen, again with the HueFX shader
 Using the "hue difference" debugging option while using the "Lineal" windows option to accept shadows in the mask
 Masking highlights using the HueFX shader